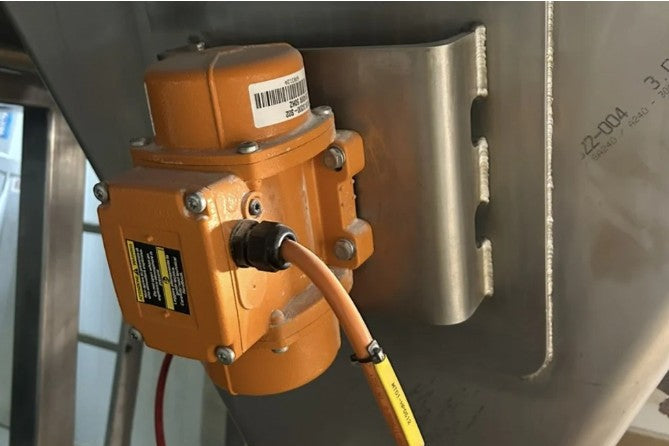
Vibrating motors are a critical component in bulk material handling systems, keeping material flowing smoothly in bins, hoppers, and chutes. Correct installation is essential—not only for optimal performance, but also for safety, equipment longevity, and minimising downtime. Improper mounting can lead to inefficient material flow, premature motor or bearing failure, structural damage, and costly repairs.
This guide covers everything you need to know to mount a vibrating motor safely and effectively.
1. Preparation Before Installation
Before touching the motor, proper preparation is key:
- Inspect the motor: Check for shipping damage or defects. Handle carefully to avoid bearing or shaft damage.
- Gather tools: Standard metric hand tools are typically required. Ensure you have torque wrenches, levels, and measuring devices on hand.
- Follow safety protocols: Never weld near the vibrator bearings or electrical circuits. If welding or grinding is required, make sure the area is free of flammable gases, dust, or vapours. Implement lockout/tagout (LOTO) procedures to isolate power sources and prevent accidental start-up.
- Check the mounting area: Ensure that the surface intended for the motor is accessible, stable, and free from debris, rust, or coatings that could interfere with installation.
2. Preparing the Mounting Surface
The purpose of a vibrating motor is to transmit energy from the motor to the material efficiently. A poor mounting surface will absorb vibration, reducing effectiveness and increasing wear.
Key points for the surface:
- Rigidity: The surface must be strong and capable of withstanding repeated vibration without flexing.
- Flatness: Remove paint, rust, or debris. The mounting area should be flat to within 0.2mm across the motor’s footprint.
- Thickness: Ideally, the surface thickness should match the diameter of the mounting bolts to prevent distortion or bending.
- Cleanliness: Ensure the surface is free of grease, dirt, or foreign objects that could interfere with bolt tightening or vibration transmission.
3. Installing the Mounting Plate
The mounting plate acts as a rigid intermediary between the vibrating motor and the hopper or bin wall. Correct design and installation ensure efficient energy transfer and reduce stress on the structure.
- Size: The plate should be at least as large as the motor’s footprint.
- Positioning: For sloped walls, mount the first vibrator at approximately ¼ to ⅓ of the wall height (measured from the discharge point). If installing two vibrators, position the second at ¾ of the slope height, 180° opposite the first.
- Plate Extension: Extend the plate at least ½ the length of the sloped wall to distribute vibration evenly.
- Welding:
- Never continuously weld the plate to the wall.
- Use stitch (skip) welds approximately 75 mm long with 50 mm gaps, maintaining equal spacing.
- Keep all ends and corners free of welds for at least 25 mm to prevent cracking of the hopper wall.

4. Mounting and Fastening
- Use high-quality bolts and secure them with the recommended torque. Check bolt tightness periodically to prevent loosening due to vibration.
- Ensure electrical connections are secure and protected from dust or moisture.
- Avoid mounting the motor on thin, flexible, or damaged surfaces, as they absorb energy rather than transmitting it to the material.
5. Key Tips for Longevity and Performance
- Alignment matters: Ensure the motor is aligned properly to prevent uneven wear on bearings.
- Inspect regularly: Periodically check bolts, welds, and mounting surfaces for signs of wear, corrosion, or loosening.
- Environmental considerations: Protect motors in wet, corrosive, or dusty environments with appropriate enclosures or coatings.
- Temperature and vibration monitoring: Overheating or excessive vibration can indicate mounting issues or imbalance in the motor. Address problems promptly to prevent damage.
Why Proper Mounting Matters
Correct installation of vibrating motors ensures:
- Efficient vibration transfer for optimal material flow
- Reduced downtime and maintenance requirements
- Extended motor and equipment life
- Minimised safety hazards associated with failed components or poor performance
Improper installation, on the other hand, can cause motor failure, inefficient flow, structural fatigue of hoppers or bins, and increased operational costs.
Expert Support and Solutions
At R.R. Fisher, we supply Italvibras electric vibrating motors and Netter Vibration pneumatic vibrators, for New Zealand industries. Whether you are installing a single motor or a complex multi-motor system, we can help ensure your equipment is installed safely, performs efficiently, and lasts longer.
Contact us today for tailored solutions and same-day dispatch, and keep your material handling systems running smoothly and reliably.

